Body Suit
Omg I have had the same under shirt for the longest time. I usually only wear it when I have a slightly too low v-neck or if my clothes are too light a color and I'm not into showing what my bra color is that day. A couple of years ago I removed a snap crotch from a Victoria's Secret shirt that was too short in the torso. This thing rode up like there was no tomorrow. I've had snap crotch items of clothing before that aren't that bad, but this thing was horrid. So I took it off said shirt and added it to my under shirt. It was my first attempt at sewing a zig zag stitch on my mom's machine and it went well. However, the crotch part has been chafing here lately and I'm not sure why. I haven't done anything to it since I sewed it on. So I thought it was time for a new one. I had bought 2 leotard/bodysuit patterns a while ago for this reason, so out they came from the drawer o'patterns.

It was hard to choose which one I wanted to attempt first, the 2601 or the 2797. I really liked the short sleeved (version A) of the 2601 but the backless-ness was a little too revealing for work. The 2797 racerback seemed decent but was kind of boring in the front. I eventually decided on making the short sleeved version but I wanted to try a higher back neckline in the long run. I figured this would be my test bodysuit and if it went well, I would try the 2797 for more of an everyday under shirt.
I began by cutting out the pattern pieces. One thing I really like about the Kwik Sew patterns is that they are on slightly thicker paper. I am not a tissue paper fan. So I actually did something different with this pattern. I've been reading my set of sewing books and a lot of them say to measure yourself and cut out each pattern piece according to what size you are on that part of your body. This leotard pattern was in Small, Medium, Large or XL instead of actual sizes. My bust measurement was in the medium category, but my hips were in the large category. So I did just that; I cut out the top parts in Medium as best as I could and the bottom parts were in the Large category. I just kept thinking back to a vintage pattern for a romper that I tried that fit horribly. I should have done this measure and adjust technique on that vintage pattern and I might not have given completely up on it.
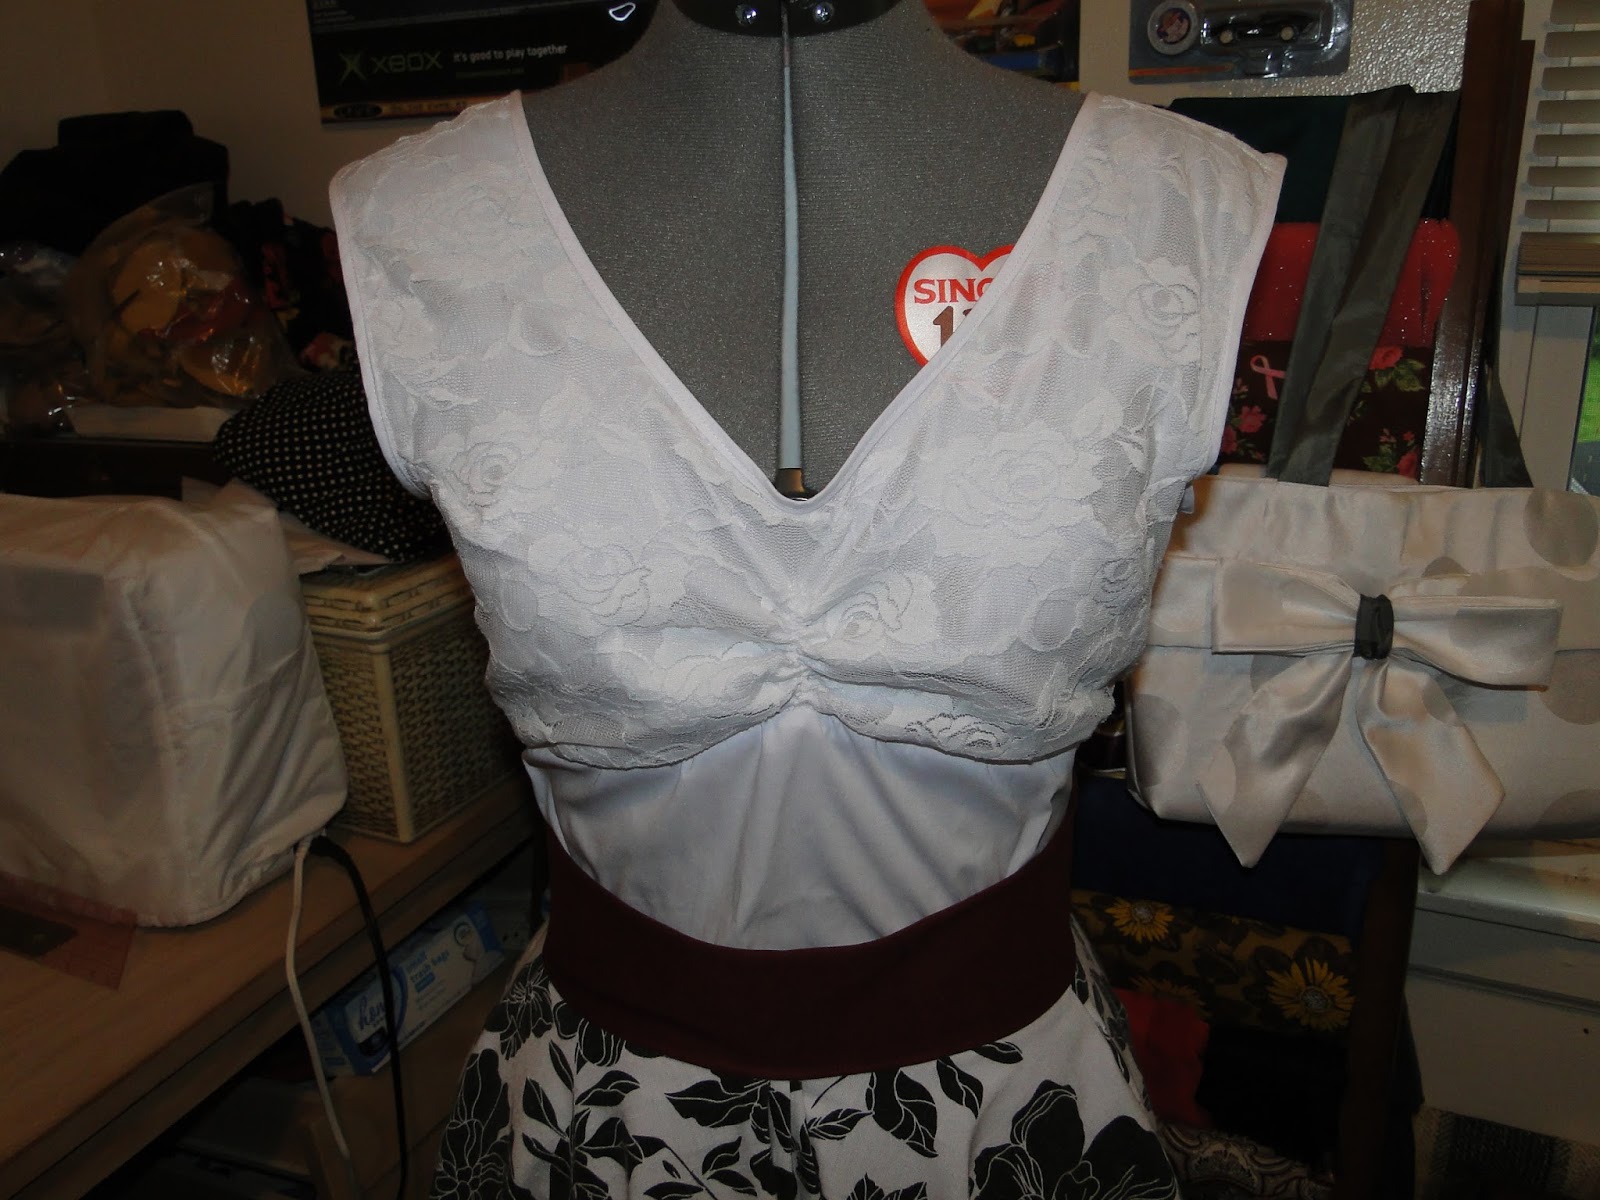
This pattern was only a couple of pieces but I tried to sneak and skip some of the pieces. I didn't want to do any fancy overlay like in the pics, but when I sewed the few bodice pieces together and tried it on, you literally wouldn't be able to wear it without the overlay pieces. So I went back to my fabric bars and chose a lovely white flowery lace to go with my plain ol white stretchy fabric. My old undershirt thingy was white with a bit of lace at the bust, but not a lot of frills. 'This one' I told my husband 'is going to be fucking pretty!' I figure most people won't be able to see any of this, but if a little is showing at the cleavage area, it won't be anything too crazy.
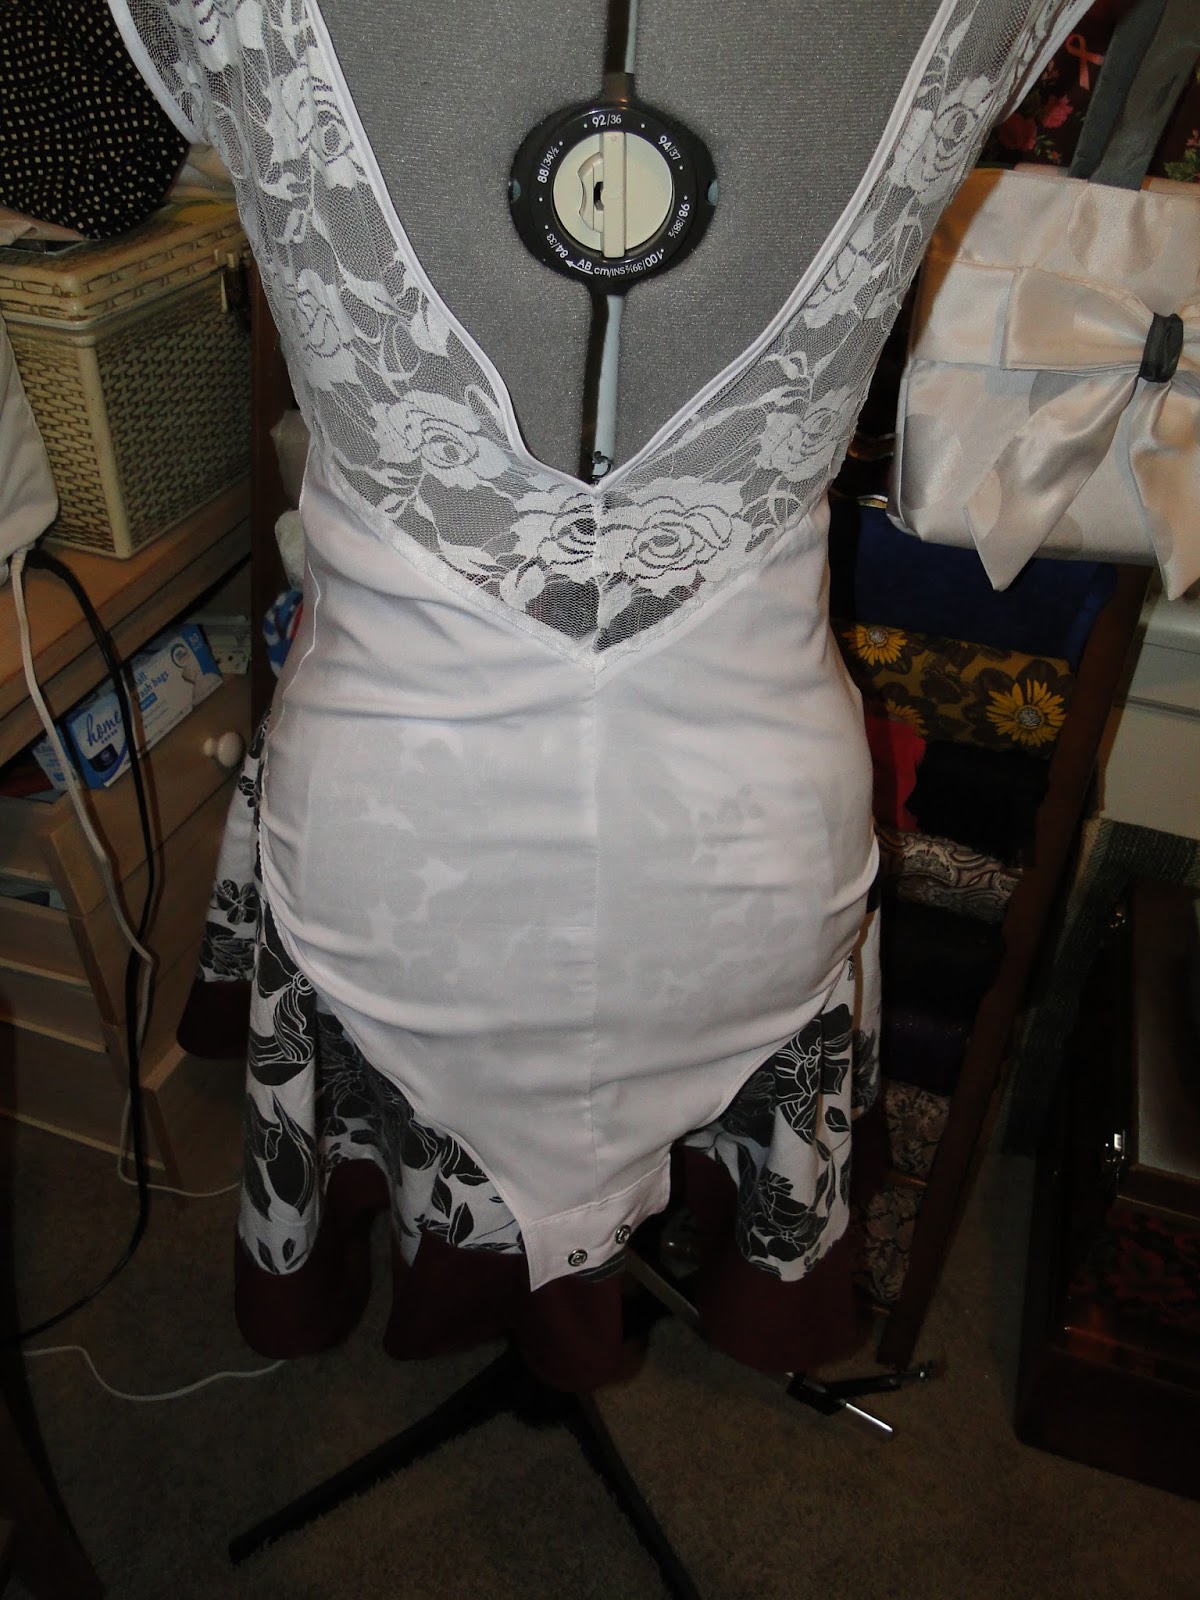
I also wanted to modify this a teensy bit, as neither of the leotard patterns had a snap crotch. I wanted an under shirt that would stay tucked in, and the simplest way I can think of is to snap it into place. So while this one did not include any instructions, that didn't mean I couldn't attempt to make a snap crotch. I really am not a fan of the word crotch, just throwing that out there.
Anywho, construction went well. I had basted the basic bodice pieces together in an attempt to cheat, so I knew how it fit before actually sewing them together. I attached the overlay pieces where needed and it all went together well. I had never sewn elastic onto clothing like this before, so it was kind of cool. For the snap crotch ((shudder)) I decided to add the snaps onto a scrap piece of this white fabric and attach that piece to the body suit to give it a little more breathing room. I didn't want it to be super tight length wise. An all day wedgie is not fun. The straps seemed a little too long, so I took them in a little on the shoulders. I also had a little bit of arm hole gap which I solved by adding a small bust dart on either side.


Ooh, I almost forgot! I also cut the fabric a certain way this time. I paid attention!! I saw where the pattern pieces called for the 'greatest amount of stretch' going from left to right, so I made sure to position the pieces on the fabric as directed. Woah... right? I did the same with the lace which was a stretchy mofo anyways, but one way was more stretchy than the other way. I am very excited because I have done a lot of the steps with this pattern that you are normally supposed to do with patterns. Steps that I normally skip. I think that it came out extremely well and I think my following the instructions helped. This is the kind of thing I was hoping would happen once we bought a house and I was able to spread out all my stuff and be organized. I would be able to take the necessary steps to put my all into a project and come out with something I was super proud of.
It was hard to choose which one I wanted to attempt first, the 2601 or the 2797. I really liked the short sleeved (version A) of the 2601 but the backless-ness was a little too revealing for work. The 2797 racerback seemed decent but was kind of boring in the front. I eventually decided on making the short sleeved version but I wanted to try a higher back neckline in the long run. I figured this would be my test bodysuit and if it went well, I would try the 2797 for more of an everyday under shirt.
I began by cutting out the pattern pieces. One thing I really like about the Kwik Sew patterns is that they are on slightly thicker paper. I am not a tissue paper fan. So I actually did something different with this pattern. I've been reading my set of sewing books and a lot of them say to measure yourself and cut out each pattern piece according to what size you are on that part of your body. This leotard pattern was in Small, Medium, Large or XL instead of actual sizes. My bust measurement was in the medium category, but my hips were in the large category. So I did just that; I cut out the top parts in Medium as best as I could and the bottom parts were in the Large category. I just kept thinking back to a vintage pattern for a romper that I tried that fit horribly. I should have done this measure and adjust technique on that vintage pattern and I might not have given completely up on it.
This pattern was only a couple of pieces but I tried to sneak and skip some of the pieces. I didn't want to do any fancy overlay like in the pics, but when I sewed the few bodice pieces together and tried it on, you literally wouldn't be able to wear it without the overlay pieces. So I went back to my fabric bars and chose a lovely white flowery lace to go with my plain ol white stretchy fabric. My old undershirt thingy was white with a bit of lace at the bust, but not a lot of frills. 'This one' I told my husband 'is going to be fucking pretty!' I figure most people won't be able to see any of this, but if a little is showing at the cleavage area, it won't be anything too crazy.
I also wanted to modify this a teensy bit, as neither of the leotard patterns had a snap crotch. I wanted an under shirt that would stay tucked in, and the simplest way I can think of is to snap it into place. So while this one did not include any instructions, that didn't mean I couldn't attempt to make a snap crotch. I really am not a fan of the word crotch, just throwing that out there.
Anywho, construction went well. I had basted the basic bodice pieces together in an attempt to cheat, so I knew how it fit before actually sewing them together. I attached the overlay pieces where needed and it all went together well. I had never sewn elastic onto clothing like this before, so it was kind of cool. For the snap crotch ((shudder)) I decided to add the snaps onto a scrap piece of this white fabric and attach that piece to the body suit to give it a little more breathing room. I didn't want it to be super tight length wise. An all day wedgie is not fun. The straps seemed a little too long, so I took them in a little on the shoulders. I also had a little bit of arm hole gap which I solved by adding a small bust dart on either side.


Ooh, I almost forgot! I also cut the fabric a certain way this time. I paid attention!! I saw where the pattern pieces called for the 'greatest amount of stretch' going from left to right, so I made sure to position the pieces on the fabric as directed. Woah... right? I did the same with the lace which was a stretchy mofo anyways, but one way was more stretchy than the other way. I am very excited because I have done a lot of the steps with this pattern that you are normally supposed to do with patterns. Steps that I normally skip. I think that it came out extremely well and I think my following the instructions helped. This is the kind of thing I was hoping would happen once we bought a house and I was able to spread out all my stuff and be organized. I would be able to take the necessary steps to put my all into a project and come out with something I was super proud of.


Comments
Post a Comment