Making A Bra - Part 3: Assembly
I am a big fan of researching things, especially things that I am interested in. So naturally before starting with the Simplicity 8229 pattern, I wanted to read some reviews. What I found when I googled it was a video where the pattern maker, Maddie, shows you how to construct it! It was like Christmas! I do things better after watching someone do it versus reading the instructions. Plus, she shows some tips that are not in the written instructions which I found extremely helpful. So I put the video on in my sewing room while I assembled. She has a pretty cool blog, too!
First. she tells you to skip the first step of applying elastic to the bridge, but to instead sew the bridge with right sides together to finish it. She didn't mention then turning it back to wrong sides together to assemble the rest of the bra, but common sense told me to turn it back out.

Then she says to apply spray adhesive to all the lining and outer fabric pieces except for the 'outer cup', which was slightly confusing because none of the pieces say outer or inner cup. But again, common sense told me that the cup side front was the 'outer cup' and the cup front was the 'inner cup', so I fused the lining pieces to the fashion fabric on everything except the cup side front pieces. She then shows you a neat trick to hide the cup seams which made the cup look pretty bitchin'! I did not use a lace with a scalloped edge for this one, so I didn't have to worry about matching scallops or designs on the lace.
She then goes on the tell you pretty much step by step how to assemble your bra, like inserting the cups to the frame and threading your straps with the rings and sliders.

I had to do a little tweaking, mainly concerning the hook and eye because I only had a set of 2x2 and it is cut for a 3x3. No biggie there. I just sewed a straight stitch on the back band and gathered it a little to get it to fit in the hook and eye.


It actually looks kind of feminine with a little gathering back there, despite the hook and eye not really matching the rest of the bra.


Aaaaand the insides. I added some boning from a thrift store bra to the side seams where she said to put some channeling, just for the hell of it.
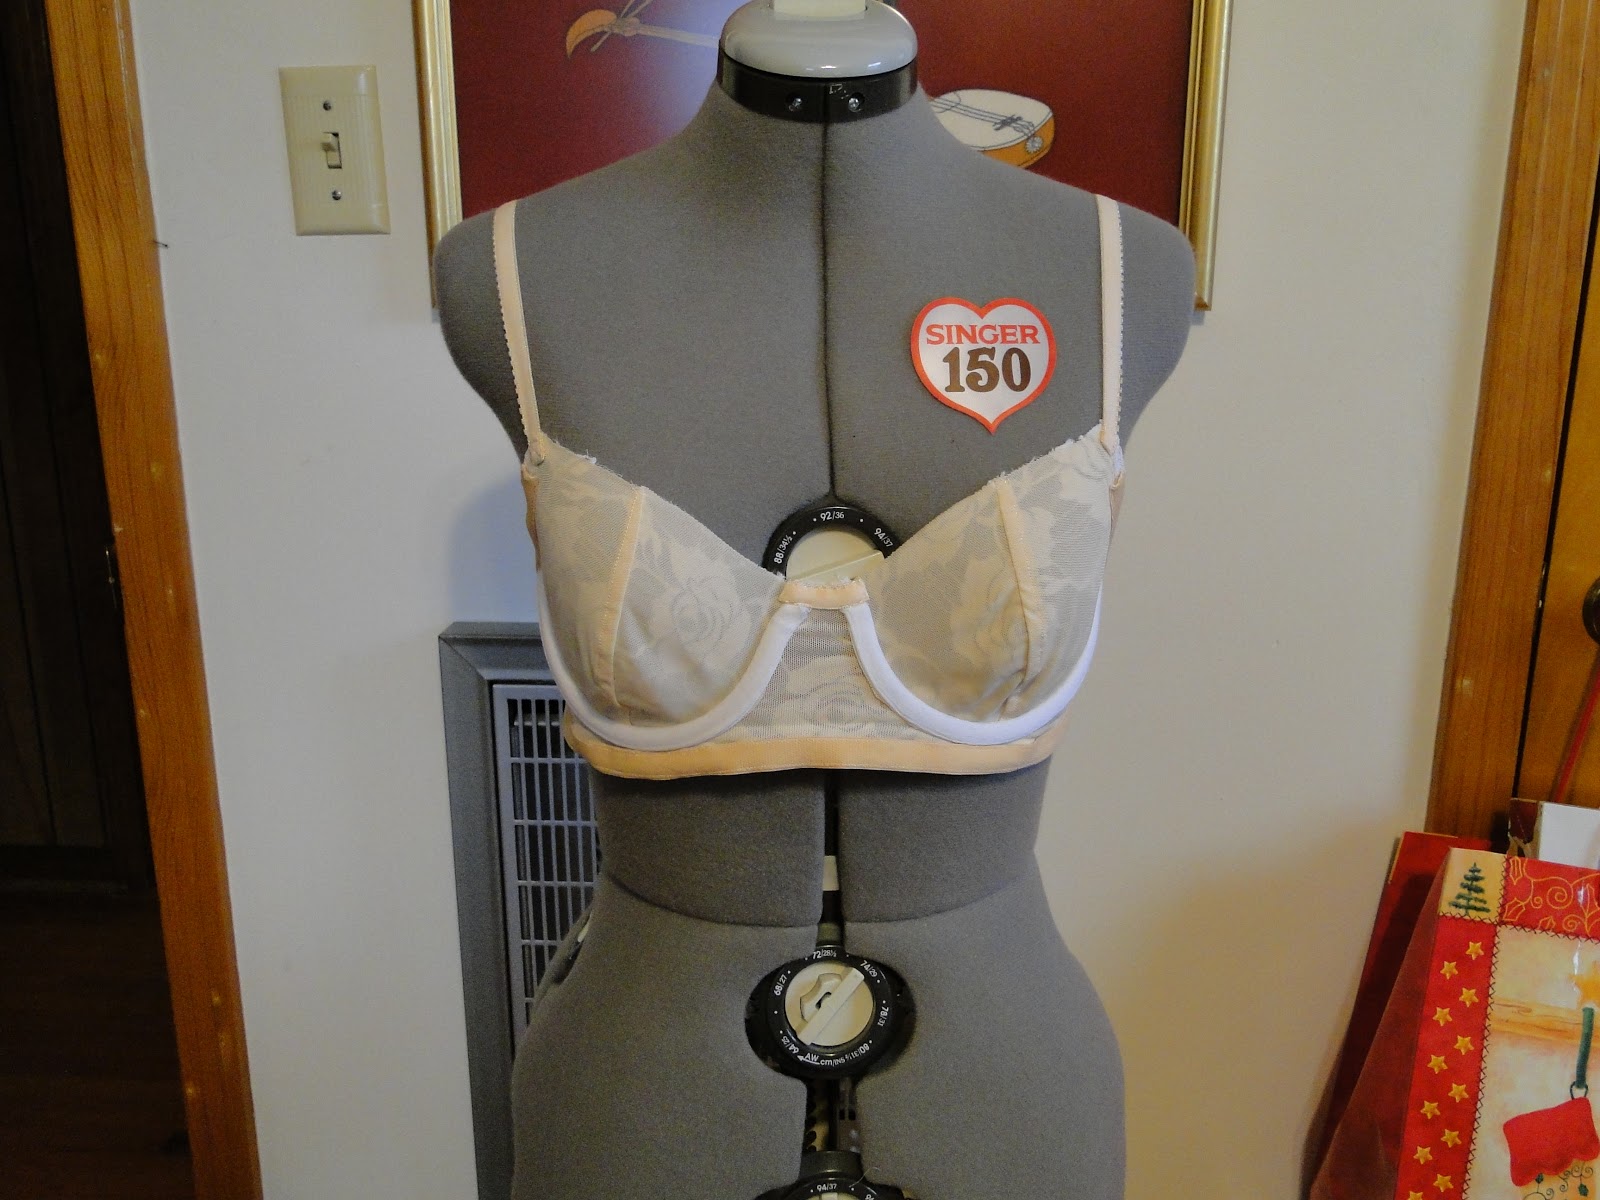
For my first bra, I was completely pleased!! I began to cut another one mere minutes after finishing my first one. The only things I wanted to change were for the outer cup because it had a little gaping, so I simply pulled the picot a little taught when sewing the second one and it fit much better. Also, the band was pretty tight. I didn't do any additional measuring when I got this pattern, so I cut for my normal size: 36 C. But the hook and eye were on the very last hook and while it was nice and snug, I wanted there to be wiggle room if needed. Or at least the option to adjust the hook and eyes. So for the second one I cut a 38 for the band and it fit a ton better!


I also tried to make my second one a little nicer on the inside by hiding the straps and boning channels in the elastic instead of just sewing it down.


I think I will next want a longer lined bra, which can't be that hard to make from this pattern. I am already wanting to buy her other bra pattern, mainly for the racer back bra. I don't do well with halters because they give me a headache, but I could see making one for a special occasion. Overall, I would give this pattern a 10 out of 10 for ease of use, not only with the pattern papers being so neatly organized by size and also for the instructional video, but also for the pretty simple overall construction. Job very well done, Maddie!
Next up, making the panties that are included with this bra!
First. she tells you to skip the first step of applying elastic to the bridge, but to instead sew the bridge with right sides together to finish it. She didn't mention then turning it back to wrong sides together to assemble the rest of the bra, but common sense told me to turn it back out.

Then she says to apply spray adhesive to all the lining and outer fabric pieces except for the 'outer cup', which was slightly confusing because none of the pieces say outer or inner cup. But again, common sense told me that the cup side front was the 'outer cup' and the cup front was the 'inner cup', so I fused the lining pieces to the fashion fabric on everything except the cup side front pieces. She then shows you a neat trick to hide the cup seams which made the cup look pretty bitchin'! I did not use a lace with a scalloped edge for this one, so I didn't have to worry about matching scallops or designs on the lace.
She then goes on the tell you pretty much step by step how to assemble your bra, like inserting the cups to the frame and threading your straps with the rings and sliders.

I had to do a little tweaking, mainly concerning the hook and eye because I only had a set of 2x2 and it is cut for a 3x3. No biggie there. I just sewed a straight stitch on the back band and gathered it a little to get it to fit in the hook and eye.


It actually looks kind of feminine with a little gathering back there, despite the hook and eye not really matching the rest of the bra.


Aaaaand the insides. I added some boning from a thrift store bra to the side seams where she said to put some channeling, just for the hell of it.
For my first bra, I was completely pleased!! I began to cut another one mere minutes after finishing my first one. The only things I wanted to change were for the outer cup because it had a little gaping, so I simply pulled the picot a little taught when sewing the second one and it fit much better. Also, the band was pretty tight. I didn't do any additional measuring when I got this pattern, so I cut for my normal size: 36 C. But the hook and eye were on the very last hook and while it was nice and snug, I wanted there to be wiggle room if needed. Or at least the option to adjust the hook and eyes. So for the second one I cut a 38 for the band and it fit a ton better!


I also tried to make my second one a little nicer on the inside by hiding the straps and boning channels in the elastic instead of just sewing it down.


I think I will next want a longer lined bra, which can't be that hard to make from this pattern. I am already wanting to buy her other bra pattern, mainly for the racer back bra. I don't do well with halters because they give me a headache, but I could see making one for a special occasion. Overall, I would give this pattern a 10 out of 10 for ease of use, not only with the pattern papers being so neatly organized by size and also for the instructional video, but also for the pretty simple overall construction. Job very well done, Maddie!
Next up, making the panties that are included with this bra!


Comments
Post a Comment